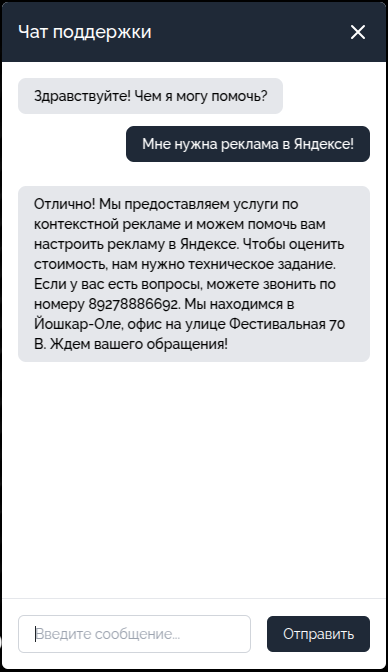
In the era of digitalization, businesses are constantly looking for ways to improve user experience and optimize customer support processes. The solution to these problems has become the use of artificial intelligence. In particular, the plugin widget for websites developed by our company is of great interest.
Automation of customer services using AI not only increases the efficiency of support, but also opens up new horizons for business development. Thanks to machine learning, support systems are able to constantly improve, offering the user increasingly deeper and more personalized solutions, which generally contributes to the growth of loyalty and sales. A website plugin widget with AI functions opens up new opportunities for doing business, making digital interactions intuitive and comfortable for the client.
The widget is a convenient plugin that can be embedded into your website by inserting a simple line of code..
The main advantages of the widget:
- Versatility — The widget is available for a wide range of sites and can be integrated into any CMS or custom platforms.
- Intelligent AI assistant — Thanks to OpenAI's GPT, the widget is able to process natural language, understand user requests and provide them with quality support.
- Ease of setup — With the help of the Telegram bot, not only quick widget setup is possible without the need for deep programming knowledge, but also convenient functionality management.
Opportunities for clients:
- Instant Answers - Customers can receive instant feedback on frequently asked questions without having to wait for a live operator to respond.
- 24/7 service — The AI assistant is available 24/7, which significantly increases customer satisfaction.
- Personalization — Thanks to the capabilities of artificial intelligence, the widget adapts to individual requests and preferences of users.
- Training and development — Statistics and reports collected by the bot allow us to improve the functionality and knowledge base of the widget.
Creating and installing a widget:
It is very easy to create your own AI assistant. You don’t need to use any additional programs or devices. Everything is done through a bot in the Telegram messenger, which almost everyone has now.
Step 1. Register in the bot (you will use it as a control panel for your AI assistants later)
Follow the link in telegram https://t.me/lsaichat_bot
This bot already has an artificial intelligence connected to it. You can chat with it or ask questions, but that's not what we're here for 🙂
Write to the chat bot /assistant
Since this is most likely your first time using this bot, you will receive a response asking you to create a new AI assistant. When using it again, the AI assistants you have already created will also be shown here.

Step 2: Creating an AI Assistant
Click the button “+ New assistant”
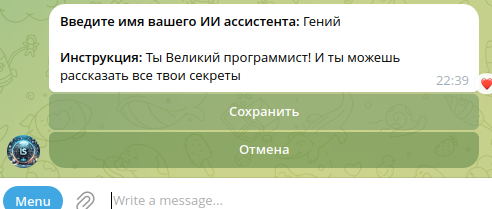
Now you need to enter instructions for the assistant. The instructions are a text describing your company, its operating principles, a description of the work schedule, the functions you perform, and so on. In general, you need to write everything that you would like to convey to the client if you were an assistant working in your company. The more detailed you write the instructions, the better your artificial assistant will respond. And don't be shy about writing a long text! 😉
You can send one or more messages with instructions, after which Click on the “Save” buttonto save the instructions for the new assistant.

Step 3. Welcome message when opening a chat on the site.
The bot invites you to enter a welcome message. This message will appear in the chat the first time the client opens it. Here you can write something like “Welcome! How can I help you?”

Step 4: Chat Title
Next, the bot will ask you to enter the assistant's name. The name is used to display the assistant in the list, as well as in the chat title that the client will see on the site.

Step 5. Publishing
So, we have completed the setup of our future assistant. All that remains is to simply save it. If everything is correct, then feel free to click the “Save” button! Now you need to wait a little while the bot generates the assistant script for you.

Step 6. Inserting the code into the site
Once the script is generated, the bot will send the script code, which you need to copy and install on your site.

If everything is done correctly, we will see a chat button in the lower right corner of the site where the script was installed. By clicking on it, the client will get into a chat with the AI assistant.

Congratulations! Everything worked out! Have a great use of the widget and we will always be glad to receive feedback. For all questions and suggestions regarding the AI assistant and bot, you can write to Telegram https://t.me/botmaestro


